After creation, the new image is saved in a special cache folder so that it can be reused for next page loads. The image in the cache folder is valid until new resize parameters are defined.
The benefits of this plug-in are:
- you do not need to worry about the size of the original image during the upload of the same: this will be resized later according to graphics needs;
- you can change image sizes in all already published article simply by changing the parameters within the plug-in options: so there's no problem if you want to change the width or height of an already published images (eg. if you increase the width of the article container you might increase the width of all images fitting 100% the article width area);
- it's possible to use crop function (resize and cut the original image in a new one with a different aspect ratio).
Download
This is a security release for Joomla Resize Image on the Fly and Cache plugin.
NOTE: Users who have already installed the extension will need to manually fix the permissions of folder /images/cache to 755 or delete it in order to be recreated by the plugin with the proper permissions.
Install
Download the plug-in from the top of this page and install from Extensions > Extension Manager in Joomla administrator area.
Plug-in Settings
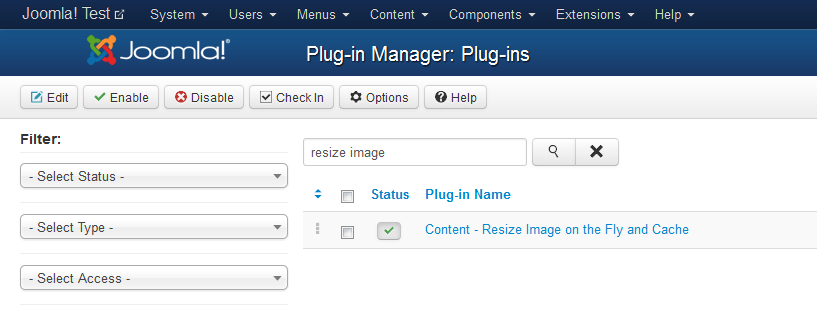
From Extensions > Plug-in Manager open the Content - Resize Image on the Fly and Cache plug-in settings page.

In the Basic Options tab you can control these settings:
- Graphic Library to use in the image processing (check in the Test Libraries tab witch libraries are available on you server) - available libraries/procedures are: Imagick Shell Execute, PHP Imagick Class and JImage (GD);
- Shell Execute Path to the ImageMagick convert command (necessary only if you use Imagick Shell Execute processing - eg. convert or /usr/bin/convert);
- Cache Folder where to save images after the processing (default folder: images/cache).
Image Definitions
The plug-in is designed so that you can define multiple options to apply in any image resize process. A set of options is defined in the following form:
<opt1>=<val1>, <opt2>=<val2>,...<optN>=<valN>
For each image type in articles, you can define the following options:
- w: image width in pixel;
- h: image height in pixel;
- crop: it the aspect ratio w/h of the resized image is different from that of the original image, adjust the new image avoiding white spaces*;
- maxOnly: resize with new values w and h only if the original image is larger than the resultant one (avoid the "grainy" effect when the image is already at its maximum size);
- quality: the quality of the resized image (from 0 to 100, default: 90).
* Applying w and h options together without crop options can generate different results according to the used library (Imagick Shell Execute applies black bands in the leftover space, PHP Imagick Class stretches the image while JImage (GD) only considers the lower value between w and h).
So generally the best practice is to indicate only one of the w or h parameter or else, if you want to set both parameters, it is raccomended to apply also the crop option, avoiding unwanted results.
In the Size definitions from the plug-in Basic Options tab, you can define how to process every image type connected to a Joomla article (already published or still to write) using options in the form described above. Available image types are:
- Default Size in Article to apply to all images within the article text;
- Intro Image Size to apply to article Intro Image;
- Full Article Image Size to apply to Full Article Image.
In the Extra Size Definitions filed you can also define a list of additional options to be applied only to the images matching the specified CSS classes. Class and option set list is defined in the following form:
<class1>: <opt1>=<val1>, <opt2>=<val2>, ... <optN>=<valN>;
<class2>: <opt1>=<val1>, <opt2>=<val2>, ... <optN>=<valN>;
...
<classN>: <opt1>=<val1>, <opt2>=<val2>, ... <optN>=<valN>;
The list defined above will affect the images defined with the following HTML code: <img class="class1" ...>, <img class="class2" ...>, ... <img class="classN" ...>.
The plug-in works also in K2 extension. In particular, it is possible to apply the resize parameters defined in Intro Image Size field to every featured image set in K2 article by enabling Override K2 Image Sizes plug-in option.
It is also possible to Exclude Articles or Categories from the plugin application.
Activation
From the Details tab of the plug-in options, activate the extension by switching the Status to Enabled.
Use in HTML Custom Module
It is possible to apply the plug-in also in Joomla HTML Custom Modules. In this case, activate Options > Prepare Content in the module settings.
Screenshots
Here's an example of the plugin configuration linked. Every field is linked to the affected article part:
Result examples
img-article: w=842, maxOnly=TRUE;

img-article-h100: w=842, h=100, crop=TRUE;

img-w200-h200: w=200, h=200, crop=TRUE;

Use in template code
You can use the "Resize and Cache" implemented in the plug-in directly in a Joomla template code. Here is an example of how to include the necessary library (after having installed the plugin) and how to use it:
<?php
// Include the necessary file and create the resizer instance
require_once JPATH_SITE . '/plugins/content/imgresizecache/resize.php';
$resizer = new ImgResizeCache();
?>


<!-- resize and show image -->
<?php $images = json_decode($this->item->images); // item is supposed to be the article ?>
<img src="<?php echo htmlspecialchars($resizer->resize($images->_image_intro, array('w' => 200, 'h' => 100, 'crop' => TRUE))); ?>"  alt="<?php echo htmlspecialchars($images->image_intro_alt); ?>" />
Important Since $images->image_intro may contains the already resized image path, use $images->_image_intro (the plugin keeps every original image path prepending an _ to the original variable name).
Troubleshooting
Problem: After the plugin installation, on the website pages I got this error: "JFolder::create: Path not in open_basedir paths".
Solution: Check the solution at this address: http://webtechriser.com/tutorials/82-joomla-3-0/83-fixing-jfolder-create-path-not-in-open-basedir-paths.


 Italiano
 English